

Photo by Thomas Bormans on Unsplash
How to Create a To-Do List Web App using Node
A to-do list web app is a common project among developers and is great for learning CRUD operations.


Table of contents
- Prerequisites
- Setting Up the Project
- How to Create a Server using Node.js
- How to Install and Use Express
- How to Create a Task and Add it to the Database
- How to Read Tasks from The Database
- How to Update Tasks in the Database
- How to Delete Tasks in the Database
- How to Add Features to the To-Do List App
- How to Deploy a Web App using Cyclic.sh
In this article, we will be creating a to-do list web app using Node, Express, EJS and MongoDB.
The app will create a task, display it according to its priority, mark a task complete and delete tasks.
You can check out the demo here and fork the finalized code in this GitHub repository.
Prerequisites
Understanding how the Internet works
HTML, CSS and JavaScript
Basic understanding of CRUD operations. You can check out my blog on CRUD here
Installing Node.js. Download Node here
Before we get started, create a directory where you will build the app. You can use a text editor of your choice, I will be using VS Code.
Let's get started.
Setting Up the Project
Create a directory and name it
to-do_list_appInitialize Git by running
git initInitialize Node by running
npm initCreate a
.gitignorefile and ignore thenode_modulesdirectoryInstall Express by running
npm install expressInstall dotenv by running
npm install dotenvIn the
.gitignorefile, ignore the.envfileInstall MongoDB by running
npm install mongodbInstall EJS by running
npm install ejsOptionally, install Nodemon by running
npm install nodemon --save-dev.This is a development dependency and it will be saved differently.
Your package.json should look like this:

- Create a
server.jsfile
How to Create a Server using Node.js
Node.js is a runtime environment for JavaScript that is Google Chrome's JavaScript v8 engine. It allows us to run JavaScript outside the browser. Node.js is used to create the server side of real-time web applications
You can create a Node server using the http module which has the createServer() method. In Node, you can access a module using the require keyword.
The createServer() method takes a callback function as its argument. The callback function has two arguments, a request and a response.
The following code creates a simple server that displays the word "Success" on the web page.
const http = require("http");
http.createServer((request, response) => {
    // This allows you to provide a status code and specify the MIME type of content
    response.writeHead(200, {"Content-Type": "text/plain"})
    // Prints to the terminal
    console.log("The server is running!")
    // adding the "Success"
    response.end("Success")
}).listen(5000) // allows you to define the port that you're using
You can run the web app using node server.js and open localhost:5000 in your preferred browser (I'll be using Chrome).
This is a great way to create a server but there is a simpler way using a Node framework called Express.
How to Install and Use Express
Let's modify the server you created above using Express.
// import the express module
const express = require('express')
const app = express()
// sending a GET request
app.get('/', (request, response) => {
    response.end("Success")
})

app.listen(5000, console.log("The server is running!"))
This code is much cleaner and more readable.
Let's start building the to-do list app.
How to Create a Task and Add it to the Database
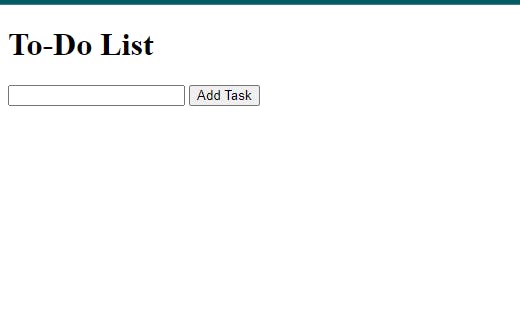
You'll start by creating an index.html file where you'll have a form.
<!DOCTYPE html>
<html lang="en">
<head>
    <meta charset="UTF-8">
    <meta name="viewport" content="width=device-width, initial-scale=1.0">
    <title>To-Do List App</title>
</head>
<body>
    <h1>To-Do List</h1>
    <form action="/createTask" method="post">
        <input type="text" name="task" id="task">
        <input type="submit" value="Add Task">
    </form>
</body>
</html>
Let's display the HTML page on the homepage instead of the "Success" text.
app.get('/', (request, response) => {
    response.sendFile(__dirname + '/index.html')
})
When you restart your server, you should see the HTML file
This is great. However, when you submit a task, the data is not saved.
Let's create a database where you will save the data.
How to Create a Database Using MongoDB
Create a MongoDB Atlas account
Create a new deployment
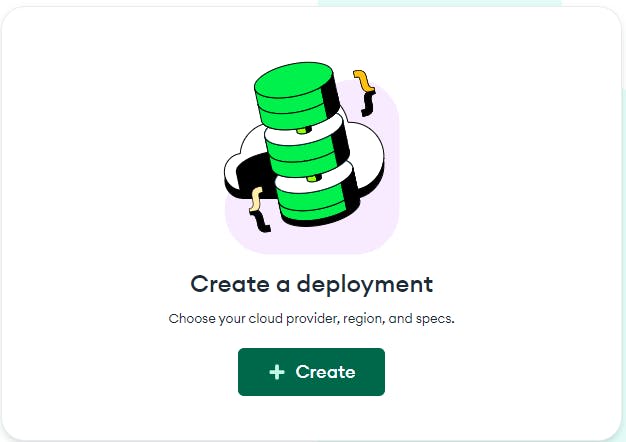
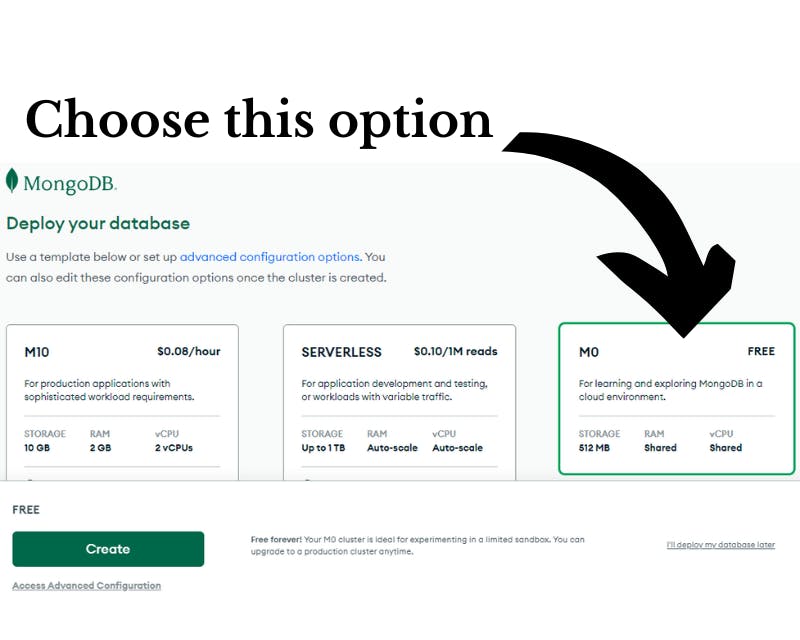
Create a free database
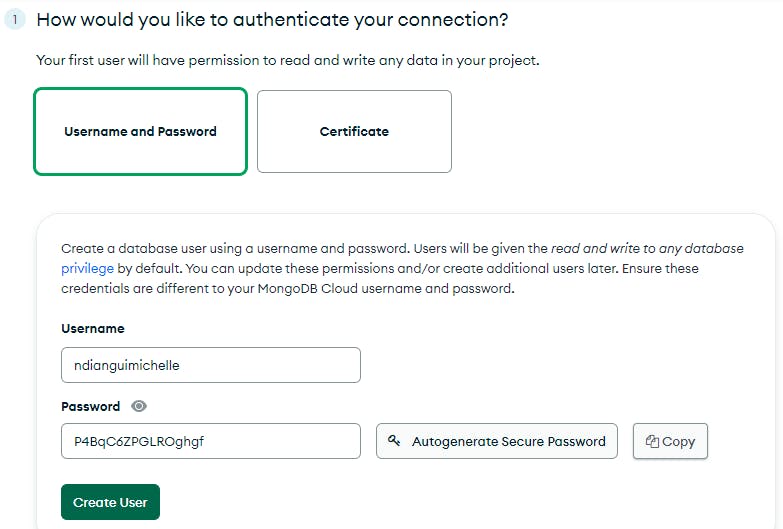
Add a username and password to your database. You should save the password as you will need it later.
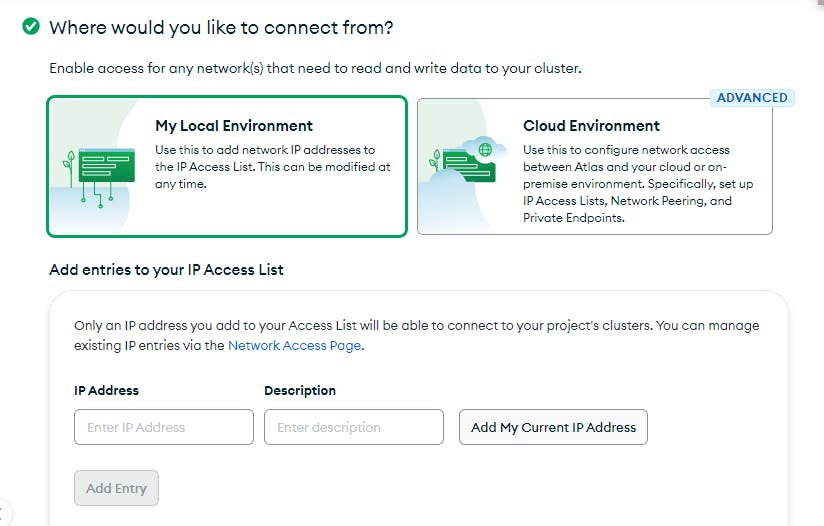
Add an IP Address
That's it. Your database is ready.
Let's get back to the server
How to Connect a MongoDB Database
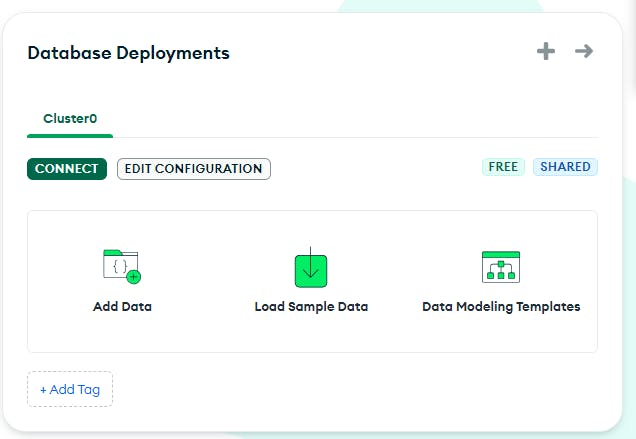
In the MongoDB Atlas overview page, you should click on connect.
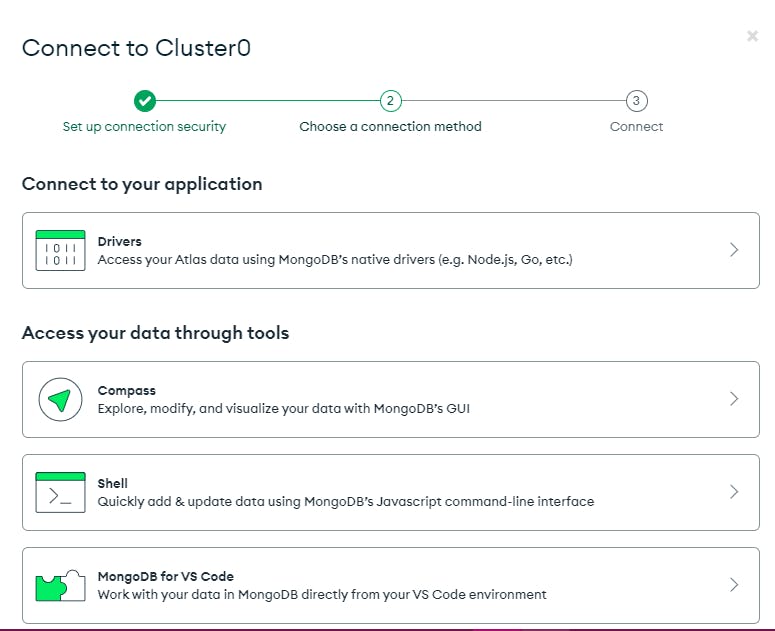
You should see the following pop-up. Choose the Drivers option as we are using Node to access and modify the data.
Next, you should see the connection string that you will add to the app. The format of the connection string is
mongodb+srv://<<username>>:<<password>>@ link to the database
The username is auto-generated but you have to add the password. (Remember the password I told you to save? Yeah, that one.)
Let's make the connection string private by creating an environment variable.
Create a .env file and create a variable for your connection string.
MONGO_URI = "mongodb+srv://<<username>>:<<password>>@ link to the database"
After the variable is created, go back to the server.js file to use this variable. To access the variable and the database, you can add the modules to the server.
const { MongoClient } = require("mongodb");
require("dotenv").config()
const databaseURI = process.env.MONGO_URI
// making the database accessible globally
let db,
    dbName = "tasks"
// connecting to the database
MongoClient.connect(databaseURI, { useUnifiedTopology: true })
    .then(client => {
        console.log(`Connected to the ${dbName} database`)
        // creating a database
        db = client.db(dbName)
    })
    .catch(err => {
        console.error(err)
    })
You can restart your server to check whether your database has been connected.
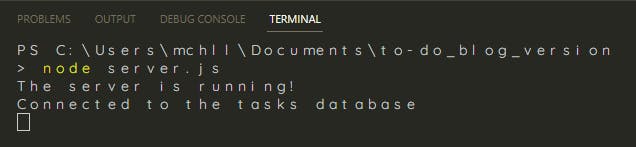
How to Save the Tasks in the Database
Let's save the form data in the database. MongoDB saves data in collections and the data is called a document. You can save data by creating a POST request. The request has all the information so you can print it to the console and find the form data.
The path you specify should be the same as the value of the form's action attribute.
app.post('/createTask', (request, response) => {
    console.log(request)
})
Restart the server and add a task then check your terminal.
The request is long and very repetitive and the data from the form is not visible. You can solve this problem by adding a body parser. Run the npm install body-parser command to install it and import the module.
// body parser for the data in the request
const bodyParser = require('body-parser')
 // creates an object from the form data and stores it in the request body property
 app.use(bodyParser.urlencoded({ extended: true }))
 app.use(bodyParser.json())
When you restart the server and add data, you'll be able to see the data in the terminal.

The property name is the same as the value of the input's name attribute. Now you can add the task to the database.
app.post('/createTask', (request, response) => {
    let task = {
        task: request.body.task,
        completed: false
    }
    db.collection('tasks').insertOne(task)
    .then(res => response.redirect('/'))
    .catch(err => {
        console.error(err)
    })
})
nodemon server.js which automatically restarts the server every time you add changes.You can check your MongoDB Atlas to see if the data was saved successfully. Go to the database then navigate to the collections tab.
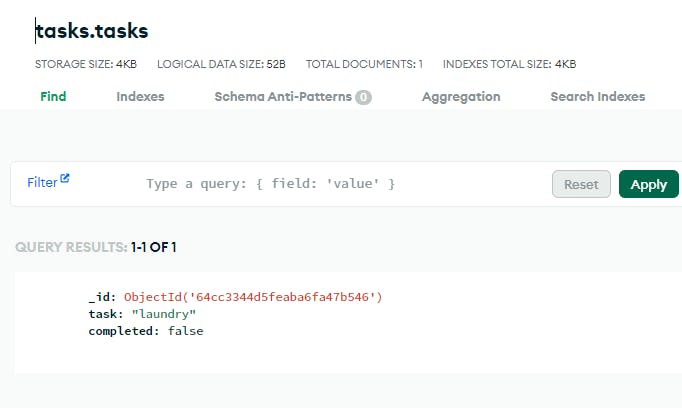
Now that you can save the tasks, let's add them to the homepage.
How to Read Tasks from The Database
In the server.js file, let's get the data from the database by modifying the "/" path.
app.get("/", (request, response) => {
// the find() gets all the data in the tasks collection
// the toArray() converts the data into an array of objects
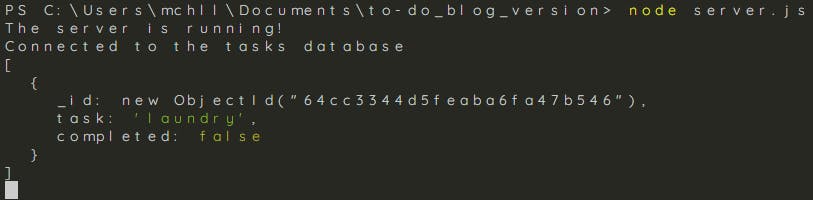
db.collection("tasks").find().toArray()
.then(tasks => console.log(tasks))
console.log(allTasks)
response.sendFile(__dirname + '/index.html')
})
You should see this in the terminal:
Let's create a template that takes the data and displays it on the homepage. We will be using Embedded JavaScript(EJS) which is a templating language.
Create a directory called views and copy the index.html into it and rename it index.ejs.
You can access the data from the template using a variable. Let's create the variable.
// tells the server the templating language you are using
// gives you access to the views directory
app.set('view engine', 'ejs')

app.get("/", (request, response) => {
    db.collection("tasks").find().toArray()
    .then(tasks => {
        // renders the EJS and returns a HTML file
        // the variable we will use in the template is 'items'
        response.render('index.ejs', { items: tasks })
    })
    .catch(err => console.error(err)
})
In the index.ejs file, you will loop through the tasks array and get the value of the task property.
EJS has a different syntax that allows us to add JavaScript logic. Logical operations are wrapped in <% %> while variables are wrapped in <%= %>.
<!DOCTYPE html>
<html lang="en">
<head></head>
<body>
<!-- the index.ejs file -->
    <h1>To-Do List</h1>
    <ul>
        <!-- loop through the array -->
        <% for(let a = 0; a < items.length; a++){ %>
            <li>
               <!-- adding the task -->
                <input type="checkbox">
                <span><%= items[a].task %></span>
            </li>
        <% } %>
    </ul>
    <form action="/createTask" method="post"></form>
</body>
</html>
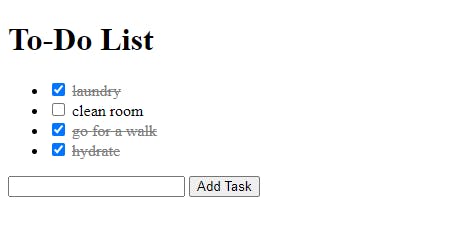
When you restart the server and refresh the browser, you should see the tasks on the page.
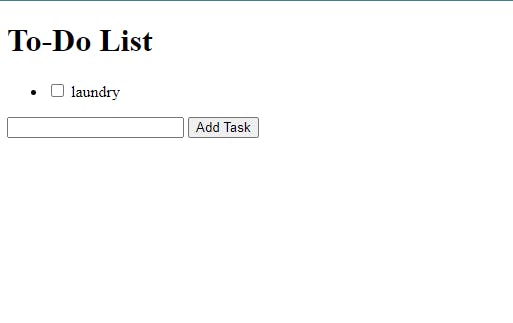
That's great but what about the tasks that have already been done?
Let's add a conditional that allows the app to check if a task has been completed.
<% if(items[a].completed) {  %>
     <input type="checkbox" checked>
     <span class="completed"><%= items[a].task %></span>
<% } else { %>
    <input type="checkbox">
    <span class="task"><%= items[a].task %></span>
<% } %>
You cannot update the database right now when you complete a task. Let's add this functionality next.
How to Update Tasks in the Database
When you complete a task, you click on it which can be achieved using JavaScript. The client-side JavaScript calls the server which updates the database.
You can add files in a public directory because Express expects you to add additional files, such as the CSS and JavaScript files there.
Create a directory called public where you create a js directory that has a main.js file.
//in the server.js file

// access the public directory
app.use(express.static('public'))
Let's create a route that will update a task's completed property.
app.put('/completeTask', (request, response) => {
    console.log('Task Completed!')
})
Now, you can send a request to the '/completeTask' route.
// in the main.js file

// get all the tasks
let toDoItem = document.querySelectorAll(' .task')

toDoItem.forEach(a => a.addEventListener('click', _ => {
    //get the task that has been clicked on
    let completedItem = a.textContent
    // send a request to the server
    fetch('/completeTask', {
        // specify that it is a PUT request
        method: 'put',
        // the request is a JSON file
        headers: { 'Content-Type': 'application/json' },
        // store the task in a JSON object
        body: JSON.stringify({ completedTask : completedItem })
    })
    .then(res => {
        //if the request is successful, return the response
        if (res.ok) return res.json()
    })
    .then(data => {
        // refreshes the page to update the content
        window.location.reload()
    })
}))
Once you restart your server and click on a task, you should see this on your terminal

You have successfully sent a request to the server.
Let's update the task's completed property.
app.put('/completeTask', (request, response) => {
    console.log('Task Completed!')
    db.collection('tasks').updateOne(
        // find the task from the request body in the database
        { task: request.body.completedTask }, {
            // changing the completed property
        $set: {
            completed: true
        }
    }, {
        //  if the task is not in the database, create the task
        upsert: true
    })
    //the response that is sent back to the fetch request
    .then(res => {
        response.json('Success')
    })
    .catch(err => console.error(err))
})
The tasks have been marked complete.
In the index.ejs file, there are styling rules for the complete class.
<head>
    <style>
        .completed {
            color: grey;
            text-decoration: line-through;
        }
    </style>
</head>
You're making great progress so far. Let's keep going.
If you accidentally click on a task, it is marked complete and you currently cannot mark it incomplete.
Let's create a request that marks the task incomplete.
// in the main.js
let completedTasks = document.querySelectorAll(' .completed ')

completedTasks.forEach(b => b.addEventListener('click', _ => {
    // get the task that has been clicked
    let notComplete = b.textContent

    fetch('/undoComplete', {
        method: 'put',
        headers: { 'Content-Type': 'application/json'},
        // create a JSON that has the task
        body: JSON.stringify( {notCompletedTask: notComplete} )
    })
    .then(res => {
        //if the request is successful, return the response
        if (res.ok) return res.json()
    })
    .then(data => {
        // refreshes the page to update the content
        window.location.reload()
    })
} ))
There is a lot of repetition in the main.js file so you can create a function.
// the complete main.js file
let toDoItem = document.querySelectorAll(' .task')
let completedTasks = document.querySelectorAll(' .completed ')

toDoItem.forEach(a => a.addEventListener('click', _ => {
    sendRequest(a, '/completeTask')
}))

completedTasks.forEach(b => b.addEventListener('click', _ => {
    sendRequest(b, '/undoComplete')
} ))

function sendRequest(a, path) {
    let task = a.textContent

    fetch(path, {
        method: 'put',
        headers: { 'Content-Type': 'application/json'},
        body: JSON.stringify( {currentTask: task} )
    })
    .then(res => {
        //if the request is successful, return the response
        if (res.ok) return res.json()
    })
    .then(data => {
        // refreshes the page to update the content
        window.location.reload()
    })
}
This makes the code cleaner and more readable.
Let's get back to the server to create the '/undoComplete' PUT request.
app.put('/undoComplete', (request, response) => {
    console.log('Task is not completed')
    db.collection('tasks').updateOne(
        // find the task from the request body in the database
        { task: request.body.currentTask }, {
            // changing the completed property
        $set: {
            completed: false
        }
    }, {
        //  if the task is not in the database, create the task
        upsert: true
    })
    //the response that is sent back to the fetch request
    .then(res => {
        response.json('Success')
    })
    .catch(err => console.error(err))
})
This is also repetitive so you can store the database updates in a function.
// the server.js file
app.put('/completeTask', (request, response) => {
    console.log('Task Completed!')
    updatingDatabase(request.body.currentTask, true, response)
})

app.put('/undoComplete', (request, response) => {
    console.log('Task is not completed')
    updatingDatabase(request.body.currentTask , false, response)
})

function updatingDatabase(task, boolean, response) {
    db.collection('tasks').updateOne(
        // find the task from the request body in the database
        { task: task}, {
            // changing the completed property
        $set: {
            completed: boolean
        }
    }, {
        //  if the task is not in the database, create the task
        upsert: true
    })
    //the response that is sent back to the fetch request
    .then(res => {
        response.json('Success')
    })
    .catch(err => console.error(err))
}
This is a great functional app but what if you add a task mistakenly?
How to Delete Tasks in the Database
First, you need to add a delete icon that will listen for clicks. You can use Font Awesome or any other icon library.
<head>
    <script src="https://kit.fontawesome.com/0acc85d45b.js" crossorigin="anonymous"></script>
</head>
<body>
    <h1>To-Do List</h1>
    <ul>
        <% for(let a = 0; a < items.length; a++){ %>
            <li class="to-doItem">
                <% if(items[a].completed) {  %>
                    <input type="checkbox" checked>
                    <span class="completed"><%= items[a].task %></span>
                    <i class="fa-solid fa-trash"></i>
                <% } else { %>
                    <input type="checkbox">
                    <span class="task"><%= items[a].task %></span>
                    <i class="fa-solid fa-trash"></i>
                <% } %>
            </li>
        <% } %>
    </ul>
    <form action="/createTask" method="post"></form>

    <script src="js/main.js"></script>
</body>
Similar to the update requests, you will send a request to the server and the server deletes the task in the database.
// in the main.js file
const deleteBtns = document.querySelectorAll(' .fa-trash ')
deleteBtns.forEach(btn => {
    btn.addEventListener('click', _ => {
        // get the text associated with the delete button
        let task = btn.parentNode.children[1].textContent

        fetch('/deleteTask', {
            method: 'delete',
            headers: { 'Content-Type': 'application/json'},
            body: JSON.stringify({ currentTask: task })
        })
        .then(res => {
            //if the request is successful, return the response
            if (res.ok) return res.json()
        })
        .then(data => {
            // refreshes the page to update the content
            window.location.reload()
        })
    })
})

// in the server.js file
app.delete('/deleteTask', (request, response) => {
    console.log("Task has been deleted")
})
Once you click on the delete button, you should see this in the terminal.

Let's delete the task from the database.
app.delete('/deleteTask', (request, response) => {
    db.collection('tasks').deleteOne( {task: request.body.currentTask})
        //the response that is sent back to the fetch request
        .then(res => {
            response.json('Success')
        })
        .catch(err => console.error(err))
    console.log("Task has been deleted")
})
Your to-do list app is fully functional and you can style it and add other features. In the next part of this blog, you will add properties to the database.
How to Add Features to the To-Do List App
You can delete all the data in the database before you add properties to make it consistent and avoid bugs later in your code.
You will be adding two properties, priority and category. The tasks are grouped by priority and you can see the task's category.
Let's modify the form by adding two more input fields that autosuggest data.
<form action="/createTask" method="post">
        <input type="text" name="task" id="task">
        <input type="text" name="priority" list="priorities">
        <input type="text" name="category" list="categories">
        <datalist id="priorities">
            <option value="High">High</option>
            <option value="Medium">Medium</option>
            <option value="Low">Low</option>
        </datalist>
        <datalist id="categories">
            <option value="Personal Development"></option>
            <option value="Health"></option>
            <option value="Financial"></option>
            <option value="Career"></option>
            <option value="Work"></option>
            <option value="Social"></option>
        </datalist>
        <input type="submit" value="Add Task">
    </form>
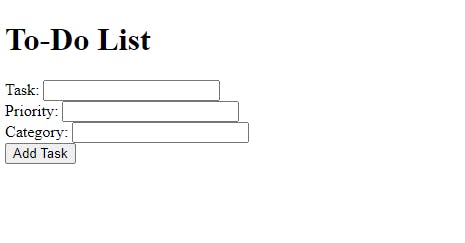
You can add a label element so that you can differentiate the inputs.
<div class="inputWrapper">
            <label for="task">Task: </label>
            <input type="text" name="task" id="task">
</div>
 <div class="inputWrapper">
       <label for="priority">Priority: </label>
       <input type="text" name="priority" id="priority" list="priorities">
</div>
<div class="inputWrapper">
        <label for="category">Category: </label>
        <input type="text" name="category" id="category" list="categories">
</div>
Let's add these properties to the database.
// in the server.js file
app.post('/createTask', (request, response) => {
    // creating the task object
    let task = {
        task: request.body.task,
        priority: request.body.priority,
        category: request.body.category,
        completed: false
    }
})
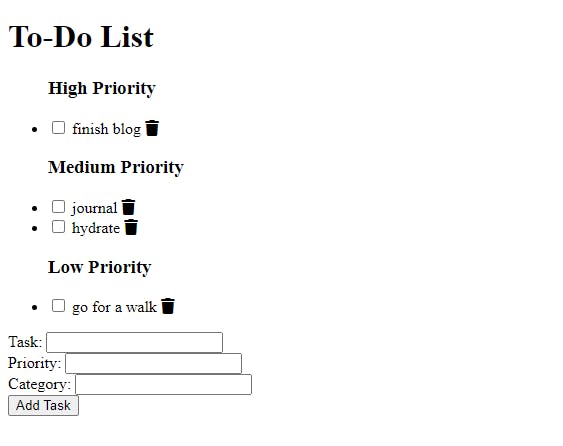
You can group the tasks by their priority by modifying the template.
<ul class="high">
     <h3>High Priority</h3>
<!-- check for the high priority tasks -->
     <% for(let a=0; a < items.length; a++){ %>
         <% if(items[a].priority==="High" ) { %>
            <li class="to-doItem">
               <% if(items[a].completed) { %>
                   <input type="checkbox" checked>
                   <span class="completed">
                       <%= items[a].task %>
                    </span>
                     <i class="fa-solid fa-trash"></i>
               <% } else { %>
                   <input type="checkbox">
                   <span class="task">
                       <%= items[a].task %>
                    </span>
                    <i class="fa-solid fa-trash"></i>
                <% } %>
                 </li>
       <% } %>
    <% } %>
    </ul>
 <ul class="medium">
     <h3>Medium Priority</h3>
<!-- check for the medium priority tasks -->
      <% for(let a=0; a < items.length; a++){ %>
         <% if(items[a].priority==="Medium" ) { %>
            <li class="to-doItem">
                <% if(items[a].completed) { %>
                   <input type="checkbox" checked>
                    <span class="completed">
                        <%= items[a].task %>
                    </span>
                    <i class="fa-solid fa-trash"></i>
                 <% } else { %>
                     <input type="checkbox">
                     <span class="task">
                           <%= items[a].task %>
                      </span>
                      <i class="fa-solid fa-trash"></i>
                  <% } %>
                </li>
    <% } %>
  <% } %>
</ul>
<ul class="low">
   <h3>Low Priority</h3>
<!-- check for the low priority tasks -->
    <% for(let a=0; a < items.length; a++){ %>
        <% if(items[a].priority==="Low" ) { %>
           <li class="to-doItem">
               <% if(items[a].completed) { %>
                   <input type="checkbox" checked>
                    <span class="completed">
                        <%= items[a].task %>
                    </span>
                    <i class="fa-solid fa-trash"></i>
                  <% } else { %>
                     <input type="checkbox">
                      <span class="task">
                           <%= items[a].task %>
                       </span>
                        <i class="fa-solid fa-trash"></i>
                    <% } %>
                </li>
     <% } %>
 <% } %>
</ul>
Your page should look like this:
Next, you will be adding the category to the template.
 <li class="to-doItem">
        <% if(items[a].completed) { %>
             <input type="checkbox" checked>
             <span class="completed">
                   <%= items[a].task %>
             </span>
             <i class="fa-solid fa-trash"></i>
          <% } else { %>
              <input type="checkbox">
              <span class="task">
                   <%= items[a].task %>
              </span>
              <i class="fa-solid fa-trash"></i>
           <% } %>
<!-- add the category for all the list items -->
               <p>
                  <%= items[a].category %>
               </p>
</li>
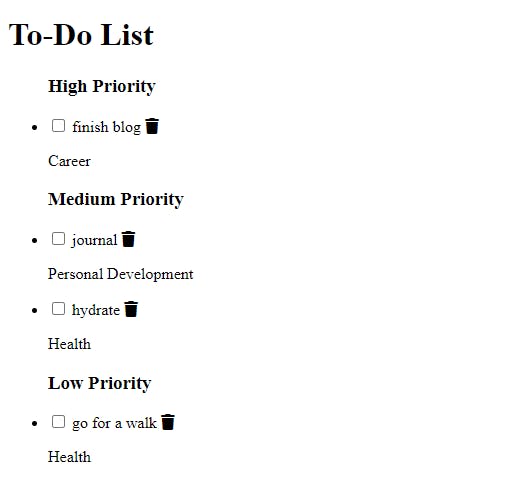
You can add styling as you please and add other features to make it your own.
The completed version of this project is available on GitHub. You can check it out here.
Let's deploy the app
How to Deploy a Web App using Cyclic.sh
Cyclic is a hosting provider that allows you to deploy a web app from a GitHub repository for free.
- You should create a
PORTvariable that stores the port number.
// in the .env file
PORT = 5000

// in the server.js file
const PORT = process.env.PORT
// use the PORT variable
app.listen(PORT, console.log("The server is running!"))
This will make it easier to deploy the app because the variable is designed to get the port number from the .env file.
Push your code to a GitHub repository
Create an account on Cyclic.sh using your GitHub account.
Navigate to the 'Link Your Own' tab and connect the repository.
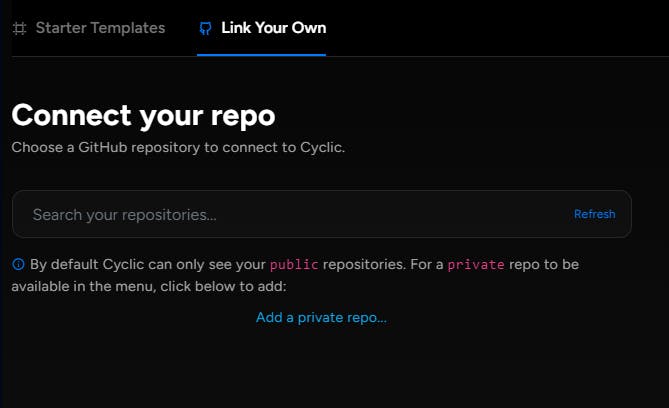
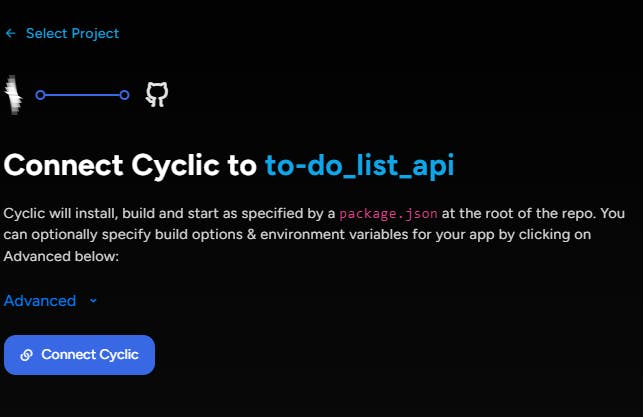
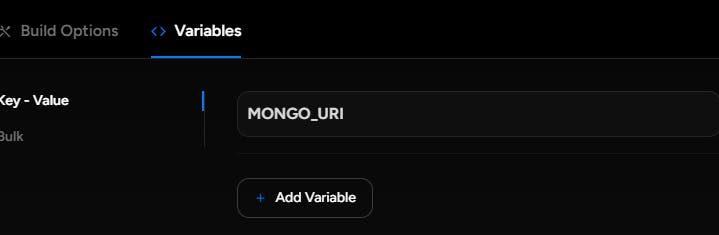
You will be prompted to Connect to Cyclic but you should click on the Advanced option so that you can add the MongoDB connection string.
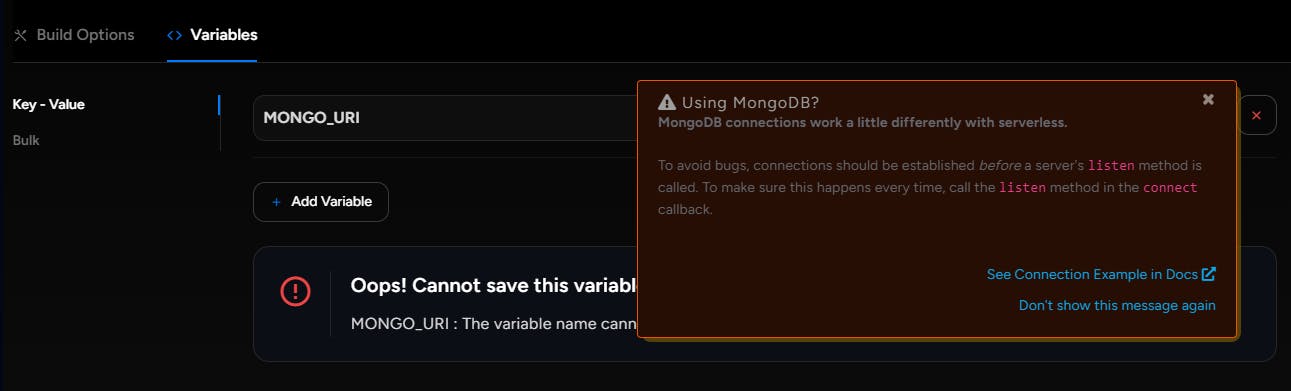
You will get a warning when you try to create the variable because Cyclic has a different syntax for connecting MongoDB databases.
In your MongoDB Atlas, you can add 0.0.0.0/0 as an IP address in the Network Access which is located under security. Alternatively, you can choose the 'Access from anywhere' option.
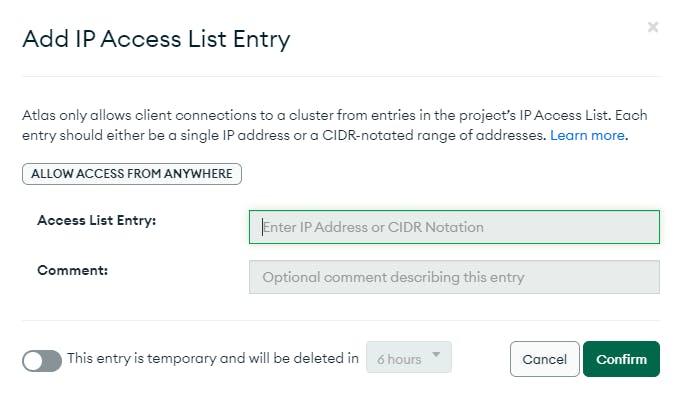
This will allow services to authenticate via the connection string.
Let's change the MongoDB connection based on the Cyclic guide.
  // in the server.js file

  // global database variables
  let databaseURI = process.env.MONGO_URI
  const client = new MongoClient(databaseURI)
  const db = client.db("tasks")

  // connecting the database after all the requests
  client.connect()
  .then(res => {
      console.log("Connected to the database")
       app.listen(PORT, console.log("The server is running!"))
  })
  .catch(err => console.error(err))
add the variable then connect Cyclic
You will be prompted to install Cyclic in your GitHub repository

You will get an error because the main file is
index.jsaccording to thepackage.jsonwhich does not exist.In the
package.jsonfile, change the value of main toserver.jsthen try to connect Cyclic again."main": "server.js"Congratulations you have deployed your web app.
That's all for this tutorial. You can check out the following resources for more information: